准备Ubuntu Server
安装最新版本的 ubuntu server, 可以使用网易开源镜像站加速下载
http://mirrors.163.com/ubuntu-releases/18.04/ubuntu-18.04-live-server-amd64.iso
在3台主机上安装系统
物理机或者虚拟机都可以,要求互相之前可以直连,内存建议在2G以上, 如果不跑什么大型系统的话硬盘15G就差不多了
这里直接在VMware Esxi 上启动3个实例安装系统并指定IP地址
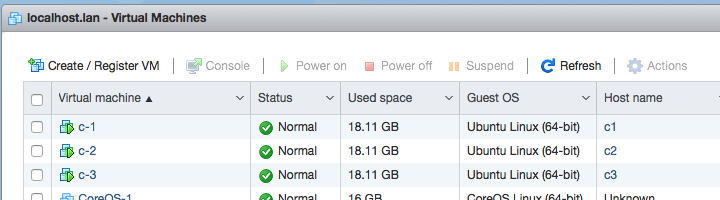
| 主机 | IP | hostname | 说明 |
|---|---|---|---|
| c-1 | 192.168.5.191 | c1 | Master |
| c-2 | 192.168.5.192 | c2 | Node |
| c-3 | 192.168.5.193 | c3 | Node |
准备环境
下面的步骤需要在3台主机上全部执行, 注意使用root用户
(可选) 更换apt的更新源为国内的地址,加速安装过程
sed -i -- 's/archive.ubuntu.com/mirrors.163.com/g' /etc/apt/sources.list
更新 APT
apt update -y && apt upgrade -y
安装 Docker CE
以下可以参照Docker 官网的文档 https://docs.docker.com/install/linux/docker-ce/ubuntu/
# 安装依赖
apt-get install -y \
    apt-transport-https \
    ca-certificates \
    curl \
    software-properties-common

# Add Docker’s official GPG key:
curl -fsSL https://download.docker.com/linux/ubuntu/gpg | sudo apt-key add -

# 添加Docker 的 apt repository.
add-apt-repository \
   "deb [arch=amd64] https://download.docker.com/linux/ubuntu \
   $(lsb_release -cs) \
   stable"

# 更新APT 并安装Docker
apt-get update -y && apt-get install -y docker-ce
安装 Kubernetes 相关的工具
# Add Google’s official GPG key:
curl -s https://packages.cloud.google.com/apt/doc/apt-key.gpg | apt-key add -

# 添加 APT repository.
cat <<EOF >/etc/apt/sources.list.d/kubernetes.list
deb http://apt.kubernetes.io/ kubernetes-xenial main
EOF

# 更新APT 并安装
apt-get update -y && apt-get install -y kubelet kubeadm kubectl
到这里基础环境就准备好了, 下来开始初始化, 注意下面的部分在Master主机上操作
初始化 Kubernetes
启动 Master
(可选) 先pull一下初始化过程中需要的docker image, 加速安装过程
kubeadm config images pull
初始化
kubeadm init --pod-network-cidr=10.244.0.0/16
pod-network-cidr参数是之后创建内部网络需要的ip段,选一个没有被占用的内网段就可以了
如果报错
if [ERROR Swap]: running with swap on is not supported. Please disable swap
swap 没有关闭, 使用swapoff -a命令关闭swap再重新运行init
输出大概如下
root@c1:/home/tian# kubeadm init --pod-network-cidr=10.244.0.0/16
I0711 03:45:48.345918    2359 feature_gate.go:230] feature gates: &{map[]}
[init] using Kubernetes version: v1.11.0
[preflight] running pre-flight checks
I0711 03:45:48.367074    2359 kernel_validator.go:81] Validating kernel version
I0711 03:45:48.367165    2359 kernel_validator.go:96] Validating kernel config
        [WARNING SystemVerification]: docker version is greater than the most recently validated version. Docker version: 18.03.1-ce. Max validated version: 17.03
[preflight/images] Pulling images required for setting up a Kubernetes cluster
[preflight/images] This might take a minute or two, depending on the speed of your internet connection
[preflight/images] You can also perform this action in beforehand using 'kubeadm config images pull'
[kubelet] Writing kubelet environment file with flags to file "/var/lib/kubelet/kubeadm-flags.env"
[kubelet] Writing kubelet configuration to file "/var/lib/kubelet/config.yaml"
[preflight] Activating the kubelet service
[certificates] Generated ca certificate and key.
[certificates] Generated apiserver certificate and key.
[certificates] apiserver serving cert is signed for DNS names [c1 kubernetes kubernetes.default kubernetes.default.svc kubernetes.default.svc.cluster.local] and IPs [10.96.0.1 192.168.5.191]
[certificates] Generated apiserver-kubelet-client certificate and key.
[certificates] Generated sa key and public key.
[certificates] Generated front-proxy-ca certificate and key.
[certificates] Generated front-proxy-client certificate and key.
[certificates] Generated etcd/ca certificate and key.
[certificates] Generated etcd/server certificate and key.
[certificates] etcd/server serving cert is signed for DNS names [c1 localhost] and IPs [127.0.0.1 ::1]
[certificates] Generated etcd/peer certificate and key.
[certificates] etcd/peer serving cert is signed for DNS names [c1 localhost] and IPs [192.168.5.191 127.0.0.1 ::1]
[certificates] Generated etcd/healthcheck-client certificate and key.
[certificates] Generated apiserver-etcd-client certificate and key.
[certificates] valid certificates and keys now exist in "/etc/kubernetes/pki"
[kubeconfig] Wrote KubeConfig file to disk: "/etc/kubernetes/admin.conf"
[kubeconfig] Wrote KubeConfig file to disk: "/etc/kubernetes/kubelet.conf"
[kubeconfig] Wrote KubeConfig file to disk: "/etc/kubernetes/controller-manager.conf"
[kubeconfig] Wrote KubeConfig file to disk: "/etc/kubernetes/scheduler.conf"
[controlplane] wrote Static Pod manifest for component kube-apiserver to "/etc/kubernetes/manifests/kube-apiserver.yaml"
[controlplane] wrote Static Pod manifest for component kube-controller-manager to "/etc/kubernetes/manifests/kube-controller-manager.yaml"
[controlplane] wrote Static Pod manifest for component kube-scheduler to "/etc/kubernetes/manifests/kube-scheduler.yaml"
[etcd] Wrote Static Pod manifest for a local etcd instance to "/etc/kubernetes/manifests/etcd.yaml"
[init] waiting for the kubelet to boot up the control plane as Static Pods from directory "/etc/kubernetes/manifests"
[init] this might take a minute or longer if the control plane images have to be pulled
[apiclient] All control plane components are healthy after 42.004178 seconds
[uploadconfig] storing the configuration used in ConfigMap "kubeadm-config" in the "kube-system" Namespace
[kubelet] Creating a ConfigMap "kubelet-config-1.11" in namespace kube-system with the configuration for the kubelets in the cluster
[markmaster] Marking the node c1 as master by adding the label "node-role.kubernetes.io/master=''"
[markmaster] Marking the node c1 as master by adding the taints [node-role.kubernetes.io/master:NoSchedule]
[patchnode] Uploading the CRI Socket information "/var/run/dockershim.sock" to the Node API object "c1" as an annotation
[bootstraptoken] using token: pbl4c9.b0ws1tfhjt6ra66a
[bootstraptoken] configured RBAC rules to allow Node Bootstrap tokens to post CSRs in order for nodes to get long term certificate credentials
[bootstraptoken] configured RBAC rules to allow the csrapprover controller automatically approve CSRs from a Node Bootstrap Token
[bootstraptoken] configured RBAC rules to allow certificate rotation for all node client certificates in the cluster
[bootstraptoken] creating the "cluster-info" ConfigMap in the "kube-public" namespace
[addons] Applied essential addon: CoreDNS
[addons] Applied essential addon: kube-proxy

Your Kubernetes master has initialized successfully!

To start using your cluster, you need to run the following as a regular user:

  mkdir -p $HOME/.kube
  sudo cp -i /etc/kubernetes/admin.conf $HOME/.kube/config
  sudo chown $(id -u):$(id -g) $HOME/.kube/config

You should now deploy a pod network to the cluster.
Run "kubectl apply -f [podnetwork].yaml" with one of the options listed at:
  https://kubernetes.io/docs/concepts/cluster-administration/addons/

You can now join any number of machines by running the following on each node
as root:

  kubeadm join 192.168.5.191:6443 --token xxxxxxxxxxx --discovery-token-ca-cert-hash sha256:xxxxxxxxxxxxxxxxxxxxxxxxxxxxxxxxxxxxxxxxxxxxxxxxxxxxxxxxxxxxxxx
配置信息拷贝到普通用户
上面有两部分是之后需要用到的。
首先退出root用户,切换到普通用户执行这一段,目的是将生成的相关配置信息拷贝到普通用户目录下,之后直接使用普通用户操作集群
  mkdir -p $HOME/.kube
  sudo cp -i /etc/kubernetes/admin.conf $HOME/.kube/config
  sudo chown $(id -u):$(id -g) $HOME/.kube/config
检查一下节点信息
kubectl get nodes --all-namespaces
tian@c1:~$ kubectl get nodes --all-namespaces
NAME      STATUS     ROLES     AGE       VERSION
c1        NotReady   master    1m        v1.11.0
因为网络还没有配置好, 状态还暂时是NotReady, 下来安装网络插件
安装网络插件
选择一种网络插件, 参考官方文档https://kubernetes.io/docs/setup/independent/create-cluster-kubeadm/#pod-network
我们这里使用Flannel
执行 (For Kubernetes v1.7+)
kubectl apply -f https://raw.githubusercontent.com/coreos/flannel/master/Documentation/kube-flannel.yml
注意新版本的ubuntu 需要更改 /etc/sysctl.conf 添加 net.bridge.bridge-nf-call-iptables=1 开启桥接网络的流量转发
echo 'net.bridge.bridge-nf-call-iptables=1' >> /etc/sysctl.conf
sysctl -p
安装完成后使用kubectl get pods --all-namespaces看下情况,
因为要下载相关的docker镜像,可能需要一点时间,等到kube-flannel-XXXXXXX 这个变成Running 之后就完成了
tian@c1:~$ kubectl get pods --all-namespaces
NAMESPACE     NAME                         READY     STATUS    RESTARTS   AGE
kube-system   coredns-78fcdf6894-8tkzx     1/1       Running   0          2m
kube-system   coredns-78fcdf6894-cbdb8     1/1       Running   0          2m
kube-system   etcd-c1                      1/1       Running   0          1m
kube-system   kube-apiserver-c1            1/1       Running   0          1m
kube-system   kube-controller-manager-c1   1/1       Running   0          2m
kube-system   kube-flannel-ds-pqpgk        1/1       Running   0          36s
kube-system   kube-proxy-kpjrk             1/1       Running   0          2m
kube-system   kube-scheduler-c1            1/1       Running   0          1m
到这里Master就配置好了,现在可以开始加入其它节点了
初始化其它 Node
进入其它的所有主机切换到root用户, 执行之前Mater初始化最后输出的join命令段, 例如
kubeadm join 192.168.5.191:6443 --token xxxxxxxxxxx --discovery-token-ca-cert-hash sha256:xxxxxxxxxxxxxxxxxxxxxxxxxxxxxxxxxxxxxxxxxxxxxxxxxxxxxxxxxxxxxxx
如果没有报错的话就完成了
接下来回到Master主机
使用kubectl get nodes查看节点的状态
tian@c1:~$ kubectl get nodes
NAME      STATUS     ROLES     AGE       VERSION
c1        Ready      master    10m       v1.11.0
c2        NotReady   <none>    1m        v1.11.0
c3        NotReady   <none>    14s       v1.11.0
到这里就完成了,稍等初始化完成可以正常使用了。
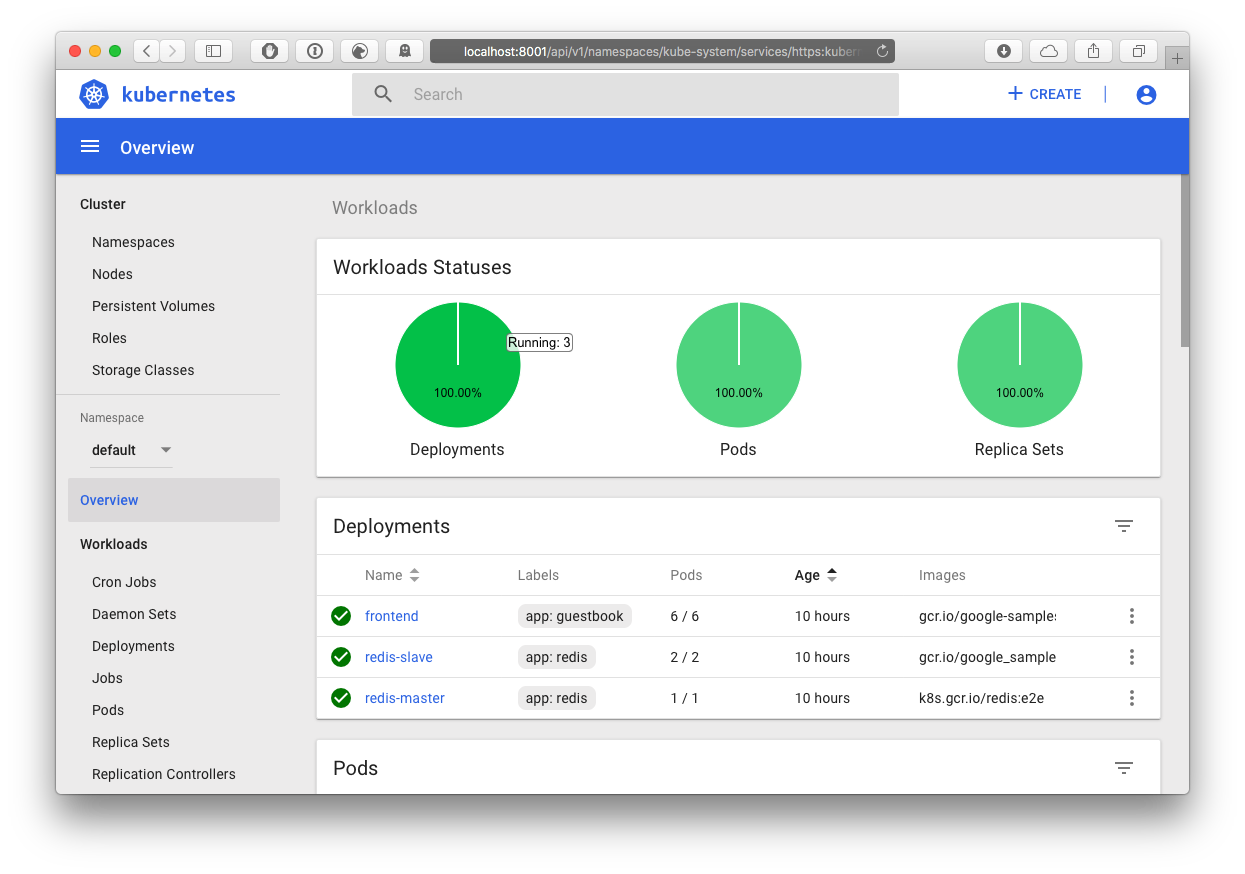
安装图形化管理界面
安装
kubectl apply -f https://raw.githubusercontent.com/kubernetes/dashboard/v2.0.1/aio/deploy/recommended.yaml

#开启proxy 方便内网访问
kubectl proxy --address='0.0.0.0'

#(可选)如果在机房内网需要经过gateway才能访问的话, 可以临时开启ssh转发,然后直接访问

TMac :: ~ » ssh -L localhost:8001:192.168.5.191:8001 gateway-server
管理地址
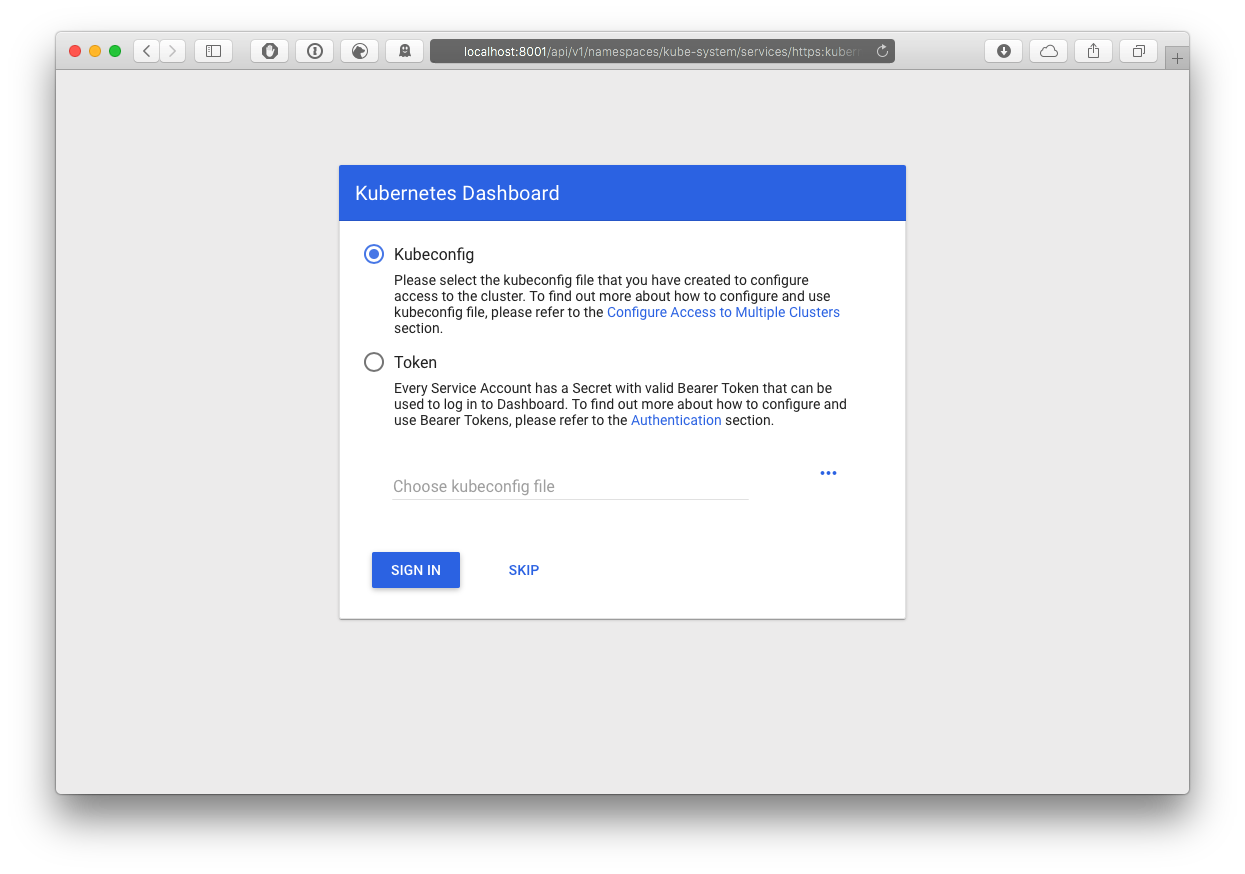
接下来要创建可以登陆管理界面的用户
创建用户配置 create_account.yaml, 用户名为admin
apiVersion: v1
kind: ServiceAccount
metadata:
  name: admin-user
  namespace: kubernetes-dashboard
应用配置kubectl create -f create_account.yaml
创建权限配置 admin_account_role_binding.yaml
apiVersion: rbac.authorization.k8s.io/v1
kind: ClusterRoleBinding
metadata:
  name: admin-user
roleRef:
  apiGroup: rbac.authorization.k8s.io
  kind: ClusterRole
  name: cluster-admin
subjects:
- kind: ServiceAccount
  name: admin-user
  namespace: kubernetes-dashboard
应用配置kubectl create -f admin_account_role_binding.yaml
好了, 接下来查看创建的用户token
kubectl -n kubernetes-dashboard describe secret $(kubectl -n kubernetes-dashboard get secret | grep admin-user | awk '{print $1}')
使用输出的很长很长的token登陆
销毁
注意,这里是销毁
移除Node
在Mater 上执行
kubectl drain <node name> --delete-local-data --force --ignore-daemonsets
kubectl delete node <node name>
然后在对应的Node 上执行kubeadm reset
删除Master
直接执行 kubeadm reset 就可以了
全文完